Wednesday, December 28, 2016

Workshop closed for Christmas

December is almost over and I'm keen to make a start on restoring the R1155L receiver, but family duties have to come first and I'll have to wait a few days more until I get home.

Over the last few weeks I've been finishing off other small projects to make space in the workshop, and collecting bits that I will need for the 1155. I've managed to find a couple of 8 pole Jones plugs to replace those hacked by a previous owner, although the mating free sockets are proving more difficult to find.

An original Air Ministry wooden box of valves was a worthwhile addition to the spares collection. I did think that I might have paid too much in the online auction, until I realised that it included a rare VR102. This is one of three valves forming the DF circuit, which many Ham Radio users removed to reduce the heater current.  As I'm intending to restore the receiver into its original configuration, finding a (hopefully serviceable!) VR102 was a big step towards this.

I'll also have to build a power supply. Eventually this will include an audio amplifier, but this can wait until the receiver is finished. Until then I'll make do with a simple version assembled from bits I already have, I just need to find a full wave rectifier valve with a 5V heater.

Tuesday, September 27, 2016

More stuff coming soon.

As usual I was too busy to do much radio restoration work in the summer, but now that autumn is here I'm starting to think about getting back into the workshop.

In the six months since my last blog entry I've acquired several radios. Recent additions to the collection include a Marconi from 1935 and a Philips from 1939, both originally battery models that have been converted to AC. Neither have been into my workshop yet, but they appear to be complete. I also added a Bush TR82B (circa 1960) battery portable which just needed a good clean, and also a Bush VT103 from around 1964, which is working but needs some more attention to improve VHF performance.

I'm looking forward to getting all of these sorted, but this year's first winter project is going to be a big one that takes priority.

R1155L Receiver as purchased
After wanting one for many years, I have finally bought an R1155, the iconic receiver that was used in many RAF heavy bombers (most famously the Lancaster) in World War two.

R1155 Receiver & T1154 Transmitter in an Avro Lancaster
At the moment I'm collecting information and some of the bits that I know I will need, and it will be a month or so before I actually start working on the set. I'll be blogging more about this historic radio over the next few weeks, so if you are interested please come back soon.

Keep listening!

Thursday, March 10, 2016

A 1940s radio with a difference

A few months ago I acquired two Wartime Civilian Receivers, one incomplete and one in a very poor state.

The incomplete radio had no speaker, no speaker baffle, and no valves. The mains transformer also looked like it had overheated, possibly due to a shorted turn, as there was a large pool of melted wax on the chassis under the transformer.  The chassis was beyond repair, but the remains of the case were worth keeping.


I already have a fully restored one of these in my collection (see blogs from March 2014) so initially I was just going put these into storage. A few days later a family member asked me if I could make him a modern radio an old cabinet, which gave me an idea.

The first part of the project was to sand the cabinet to remove the worst scratches and gouges. After repairing  the damaged areas with filler and sanding again I gave the cabinet a few coats of Danish oil. A new speaker baffle made from MDF and covered with speaker cloth finished off the job.

Turning to the chassis, I stripped off all the components with the exception of the tuning capacitor, and put them in my spares box.


The tuning scale and disc were both in poor condition, so after sanding off the remains of the old paint I treated them both to a fresh coat of pale yellow enamel spray paint, as close to the original as In could get. Fortunately I had a some waterslide transfers left over from the earlier WCR restoration, so after the paint had hardened I was able to replace the tuning scale with a pristine new version.

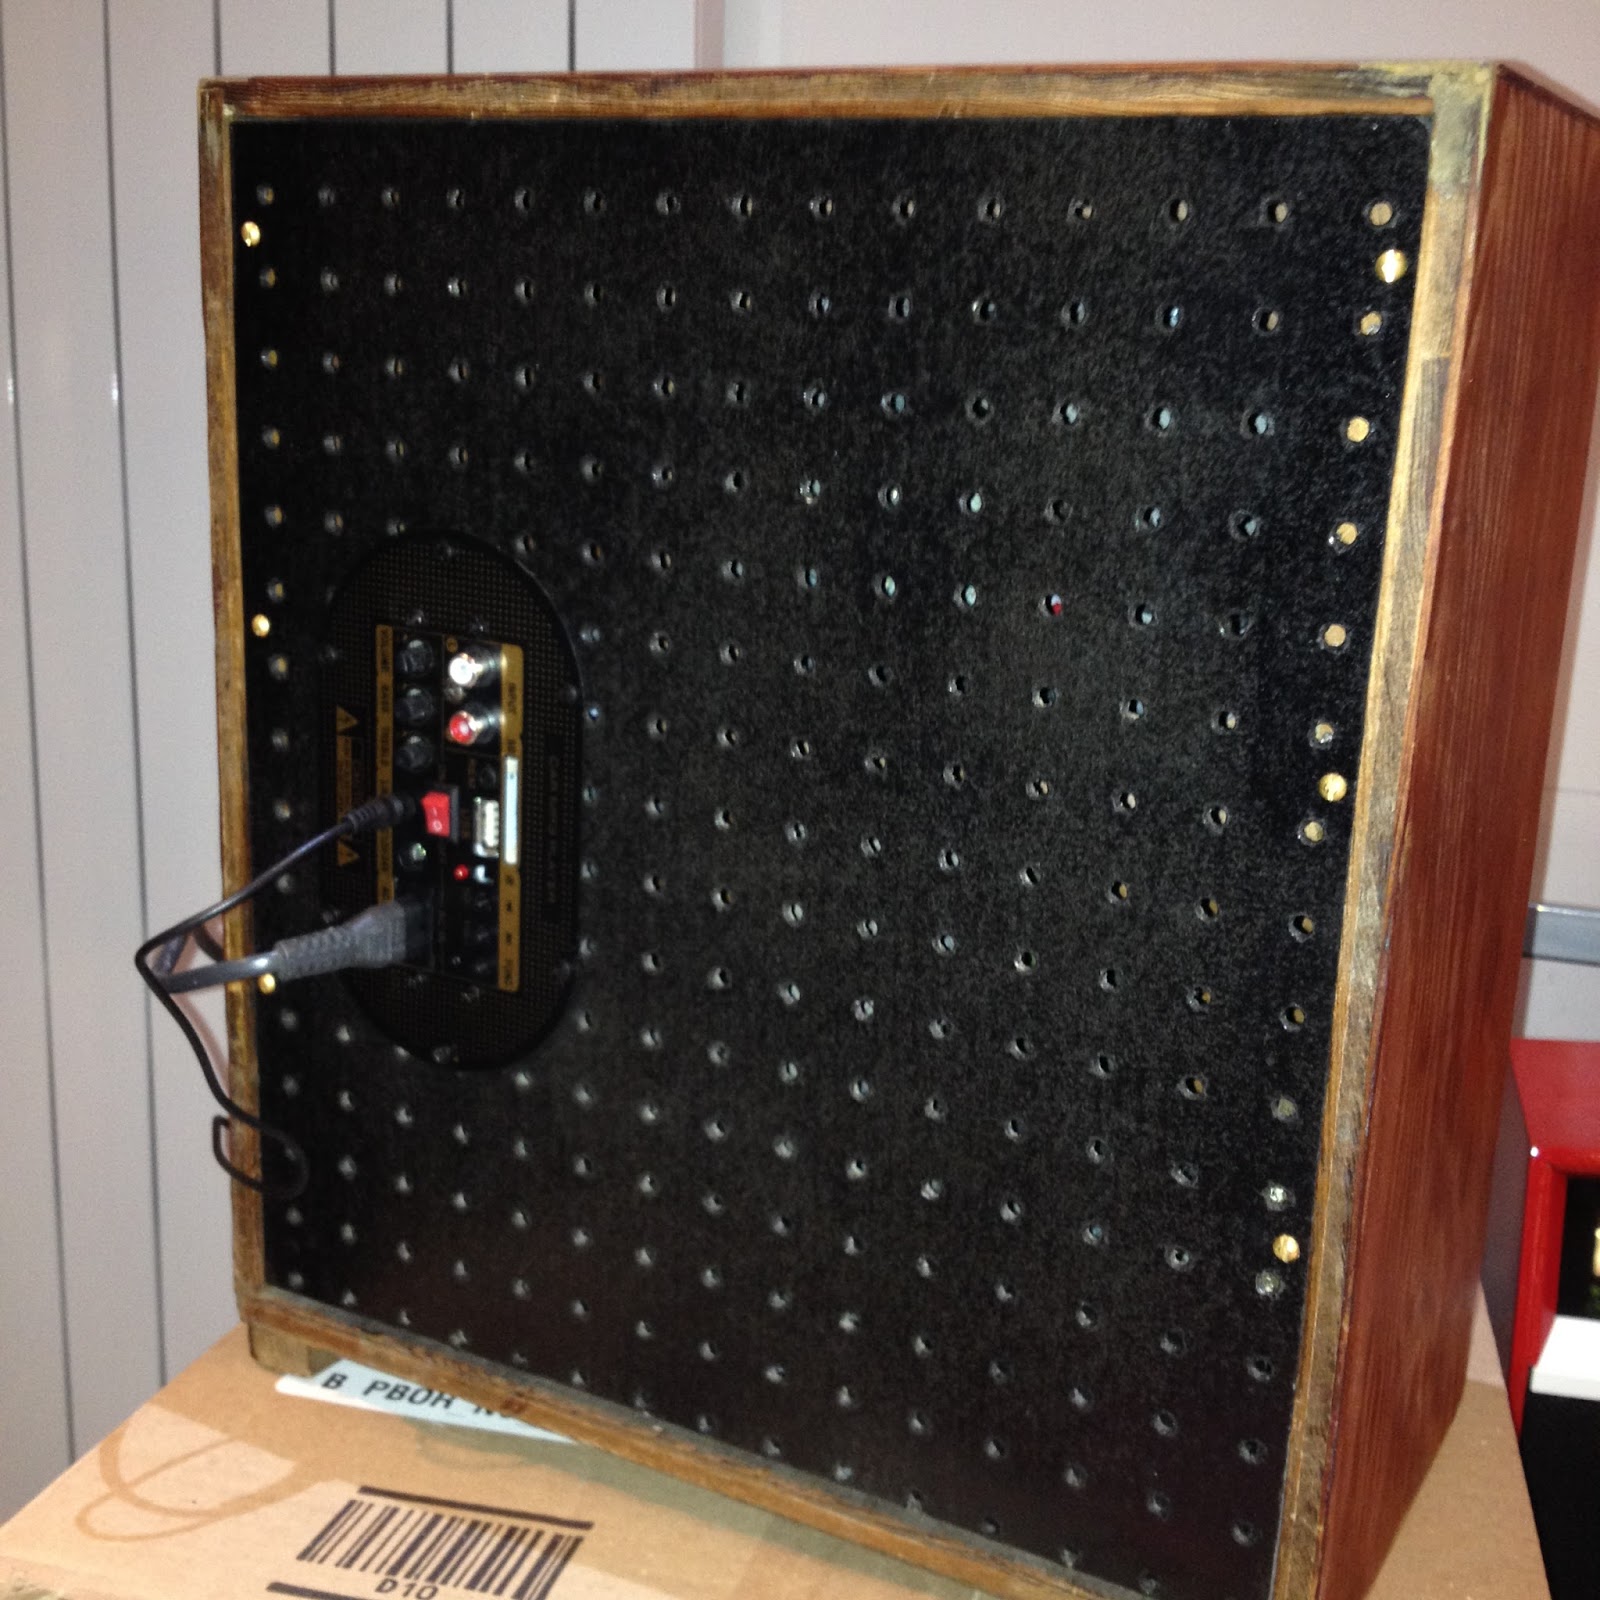
The original back panel was missing, so I made a new one from perforated hardboard; I think its called peg board. I made this the same size as the cabinet, to hide the modern bits I planned to add next.

I fitted a very nice ELAC elliptical loudspeaker. It has a very large magnet for the size of the speaker and appears to be the same as those fitted in the later Hacker Herald transistor radios, which are renowned for their audio quality.

The final part of the conversion (because that it was it had become) was to fit modern electronics. I chose a Chinese made module that combined an MP3 player with a 20W audio amplifier. It will play MP3 files from  an SD card or a USB stick; and there is also a line input with both RCA (phono) sockets and a 3.5mm jack socket. The module will operate from either AC mains or 12-24V DC.

SD Card, USB, Phone & 3.5mm Jack inputs


So how does it sound?  Great! It combines the style and character of a 40's radio with the convenience, sound quality and safety of modern electronics.

I sold this one within days of completing it, so I have now converted the other one as well.  I've made a couple of improvements to this one that I might blog about later.

Keep listening!

Wednesday, January 20, 2016

Bush VHF80c completed

Here's the completed VHF80c sitting on soak test in my workshop tonight.

I'm getting to like this little set, and its later cousin the VHF81. They are easy to work on, and with a bit of effort they can be made to look quite smart.  They are also good performers, with nice quality sound and good sensitivity on AM.

The good AM performance is probably due to the unusual circuit design, in which the VHF 1st IF amplifier doubles as an RF amplifier for LW and MW. In most domestic AM superhets the tuned RF is applied directly to the mixer (frequency changer) valve without any amplification, and all the gain is in the IF and audio stages.


Bush VHF80C after restoration

The trickiest part of the restoration was replacing the four rubber anti-vibration mounts between the tuning capacitor and the chassis, basically rubber grommets with a brass bush through the centre. The old rubber had become hard and brittle. Getting them out was much easier than persuading the new grommets to go in, but at least the new ones should last another fifty years before they need replacing again!

Here's the list of materials that were required to do this restoration.

5 x 10nF polyester film capacitors
1 x 2.2nF  polyester film capacitor
1 x 4.7uF electrolytic capacitor
1 x 0.22uF 275V AC X2 rated capacitor
2 x MES lamp holders
2 x 6V 0.1A lamps
4 x rubber grommets (to fit 8mm hole, centre hole 5mm)
Odd bits of silicone sleeve
2 core mains flex
Mains plug with 1A fuse 
Cord for replacing the tuning drive
White enamel spray paint
Masking tape and newspaper
Brasso for cleaning the Bakelite


With one more done...the question is which set to do next.

Keep listening!


Sunday, January 17, 2016

A nice little set for my kitchen

I've just realised that I didn't post a finished picture of the Bush VHF81 that I restored back in August last year.

I said the colour scheme would be 'something different'... and here it is.

Bush VHF81 with a one-off cabinet

This lovely little set now lives in my kitchen and is regularly used. It has a very good sound, particularly on VHF. Not bad for a set that's around 50 years old.

Keep listening!

Back in the workshop

It's been a while, but now the long dark January nights are with us again I have found time to sort out some vintage radio projects that have built up during the summer.

I've got a couple under way, but the one I have spent time on this weekend is a Bush VHF80c from the early 60's. I don't know its exact age yet, but this model first went on sale in February 1960.

I restored a couple of VHF81s a few months ago, which have the same chassis as this but in a wooden case. I have taken a liking to these sets which are easy to restore and perform rather well, so when I saw this one in a junk shop during the Christmas holiday I had a little haggle with the seller. She wanted £22 initially, but we agreed on a very reasonable £15.

Electronic restoration was fairly straightforward, with three wax paper and three Hunts capacitors to replace. I always replace these on sight as they are almost always leaky. The other job was to reform the reservoir and smoothing capacitors, three capacitors in all in a single metal can. This is a time consuming task as there are a lot of wires to unsolder.


On firing up the set via a lamp limiter I could hear stations on all three bands, so I carried on with restoration of the chassis, replacing the broken tuning cord and the lamp holders. The latter are made of rubber, which hardens with heat and age and goes out of shape. A couple of cheap modern plastic holders and two 6V 0.1A lamps sorted the problem.

This is is an AC/DC set (no transformer) so the mains neutral wire is connnected to the chassis. For safety during testing I always use an isolating transformer to prevent the possibility of the chassis becoming live.


The cabinet was in good condition (apart from being filthy) although the white paint had rubbed away in places over the years, particularly around the knobs.

After stripping down the cabinet I used a fine abrasive paper to smooth the painted areas, before protecting the unpainted Bakelite areas with newspaper and masking tape. I then spray painted all the white areas with a quick drying enamel.


I applied four light coats of paint, leaving each to dry for around 10 minutes between each coat. I now need to leave it to harden for a couple of days before removing the masking and tidying up any rough edges between painted and unpainted areas.

I'll post more later.

Keep listening!